Table of Contents
After I have built a WordPress website for my clients, they often want to update and edit the site themselves. This step by step guide focuses on instructing business owners on how to edit their WordPress photo gallery. There are some key details to be aware of. Once I’ve pointed them out, editing your own WordPress photo gallery will be a breeze.
Important Non-Tech Tip:
The Gallery Module is like a carton of eggs and the images are the eggs. When editing, you need to be aware of which view you are in—the gallery view or the image view. When there are two icons showing (the gallery and the image icon), you are in Image editing. One icon only, the gallery icon, you are in Gallery editing. The right column settings change in relationship to whether you are in the gallery or an individual image you clicked on.
This principle also applies to columns and what is in the columns, and so many other nested WordPress Gutenberg modules. Once you recognize this detail, editing in WordPress becomes so much easier. I think this is why novices get frustrated with editing their site. It can be just one small important detail they miss that derails them from having a good experience editing their own site.
To take the egg analogy even farther. When users click on an image in the gallery of the live site, the activated lightbox plugin hatches the egg and reveals the expanded chick. Now, lets leave the hen house and get on to the tutorial.
First: Size and Compress your Photos
There are many ways to do the same thing working in web design and WordPress, and the same goes for editing a WordPress photo gallery. Just for organizational reasons and accuracy, I recommend sizing and compressing your photos outside of WordPress before you even log in to your site. If you don’t have the available software, you can also size and compress your photos within WordPress. You can size them using the media library editor, and compress them using a WordPress plugin like reSmush.it.
No matter how you do this process, the key thing to remember is photos come out of the camera, even phones, too large for the web and there are two ways to reduce their digital size—pixel width and compression (or quality). Ideally you want your gallery images to be no larger than 300kb (kilobytes). Other images on your website should be even smaller, under 100kb. Images out of a camera can be much larger, as much as 20mb (megabytes). These large files will slow down a site tremendously. Keeping your photos small makes for a better experience for users and improves Search Engine Optimization.
Sizing and Compressing Photos in Photoshop
I know that many clients will not have Photoshop, but I’m instructing the process in Photoshop because it is how I do it. One of many free options is using Canva’s image resizer. And, you can compress the image using a free tool at tinypng.com. On to the Photoshop method in seven steps:
1. File > Open
2. Choose your image from your finder or directory
3. If image is equal to or larger than 1920px wide as a horizontal OR equal to or larger than 1920px tall as a vertical, go to File > Export > Export As
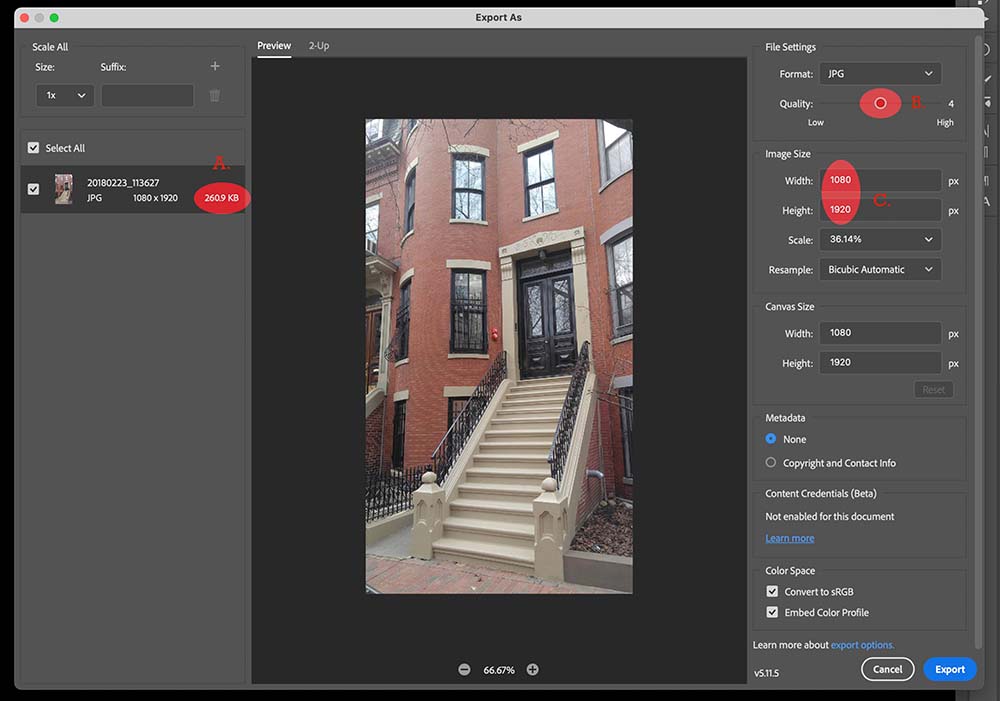
4. In the export window change Quality to 3 or 4, and horizontal photos to 1920px wide and vertical photos to 1920px tall. Neither side should be larger than 1920px. This should bring the photo to a web friendly size less than 300kb. If not, make the image smaller in size, not in quality. I notice that you see a distracting degradation in the Quality at 1 and 2.
5. Click Export and Save to a folder dedicated to uploading to your website.
6. Repeat these steps until all photos have been sized in Photoshop. (You can batch resize, but this is a whole other lesson that I won’t get in to here)
7. Proceed to your website to create the WordPress photo gallery.
Second: Log In To Your Site
Logging in is the obvious step but if you haven’t updated your site in a while, this is the time you dig in to your website records and find your login (or ask your web designer).
Tech Tip: Follow the red dots. I’ve added these in the screen shots to guide you.
- Login in to your dashboard at: https://your-domain/wp-login.php (replace “your-domain” with your domain of course)
- Enter your username and password
- Click the login button
- You are logged in when you see the black bar at the top
Third: Uploading Images To Your Website
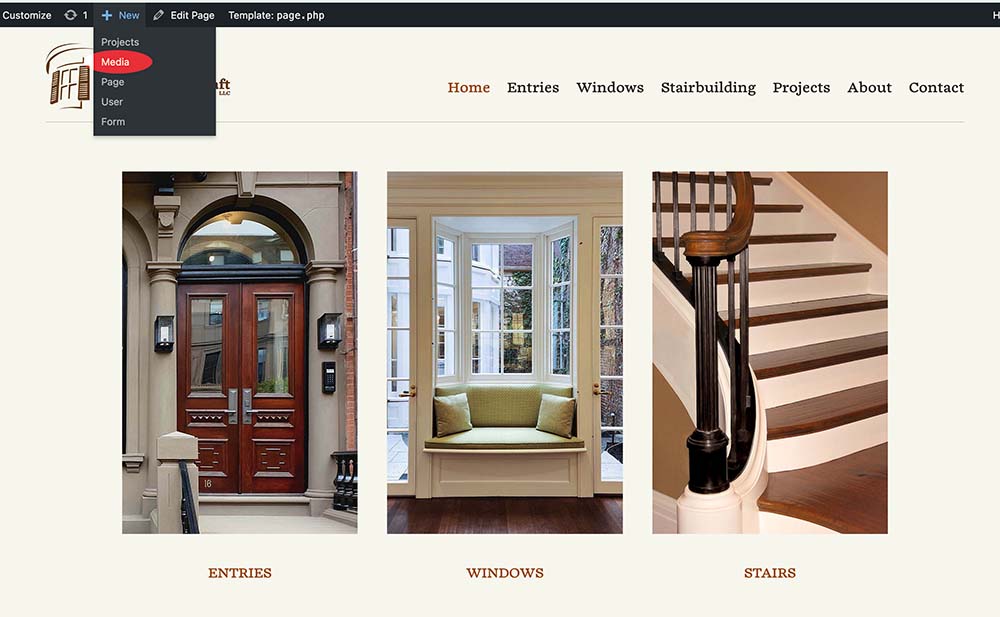
1. Although, not necessary, it is best practices to work on your images and upload them in to the media gallery first. Assuming you have completed your images in Photoshop, and logged in to your site, let’s start by going to the media gallery. In the black bar at the top, hover over “+ New” and click on “Media” in the dropdown.


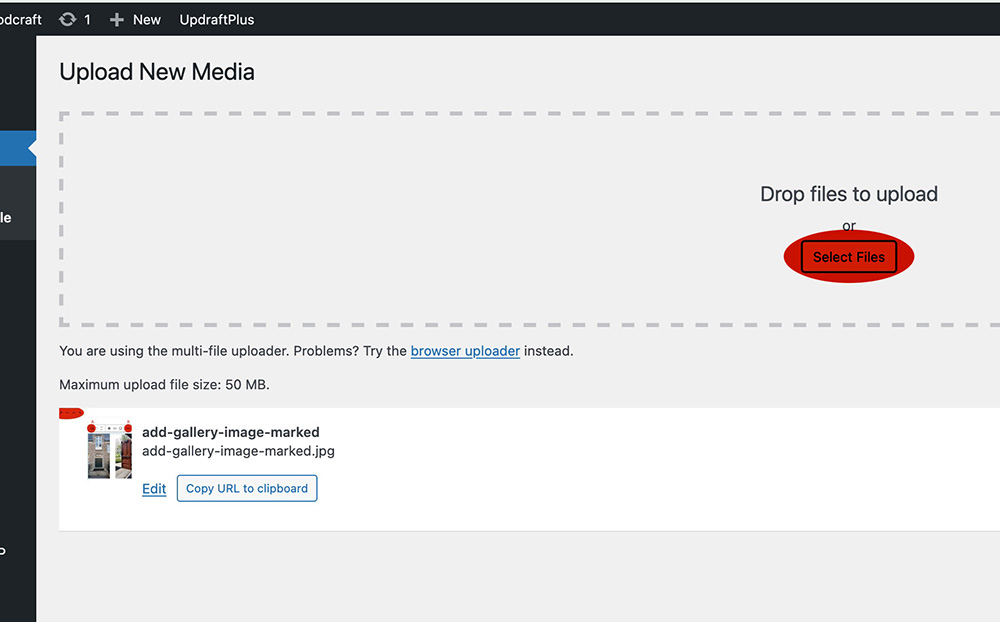
2. In the media gallery, click on the “select files” button. Your computer files will pop up.

3. Find your images, open either one image or all of the images that you want uploaded. Be sure they are the images that you sized and compressed to be 300kb or under. Opening these images will upload them in the media gallery. You can proceed with putting them in your gallery.
Creating A Gallery
Although this article is focusing on editing a WordPress photo gallery, this tutorial wouldn’t be complete without showing how to create a photo gallery. Let’s assume that you have already created a page and are in the Gutenberg editor of the page.
Upgrade Your Gallery with a Lightbox Plugin
Before you even add your gallery on the page, I recommend adding a lightbox to the gallery. I can’t believe WordPress hasn’t simply included this in the core. It seems pointless to me to have a gallery that displays as thumbnails only without being able to expand them to full images. So, we are going to need to use a plugin to create a lightbox. Most of the free plugins are ugly, and my favorite one, WP Featherlight, was just removed from the plugins due to a security issue in the code. The best looking and most stable plugin I can find at this time is Firelight Lightbox.
1. Under new plugins in the dashboard, search for, install, and active Firelight Lightbox. You don’t need to do anything to the plugin, it just automatically works (as long as you do one small repetitive task to the images in the gallery. I’ll tell you what that is in a moment).
Go To Your Page
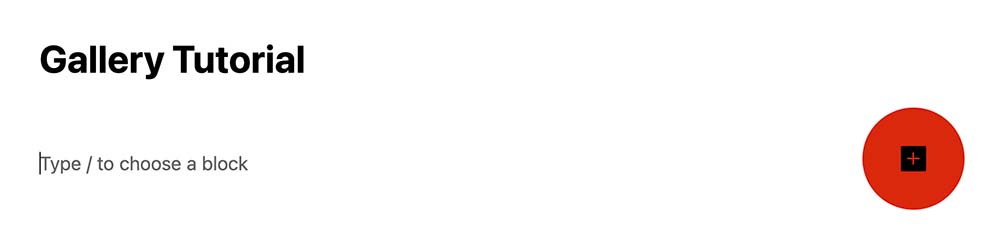
2. Now, find the location you would like to have a gallery on your page. Hover until you see a blue line with a plus and click. Or, click on the black plus which turns blue on hover at the bottom right of the Gutenberg editor, or click on the blue plus at the top left of your browser.
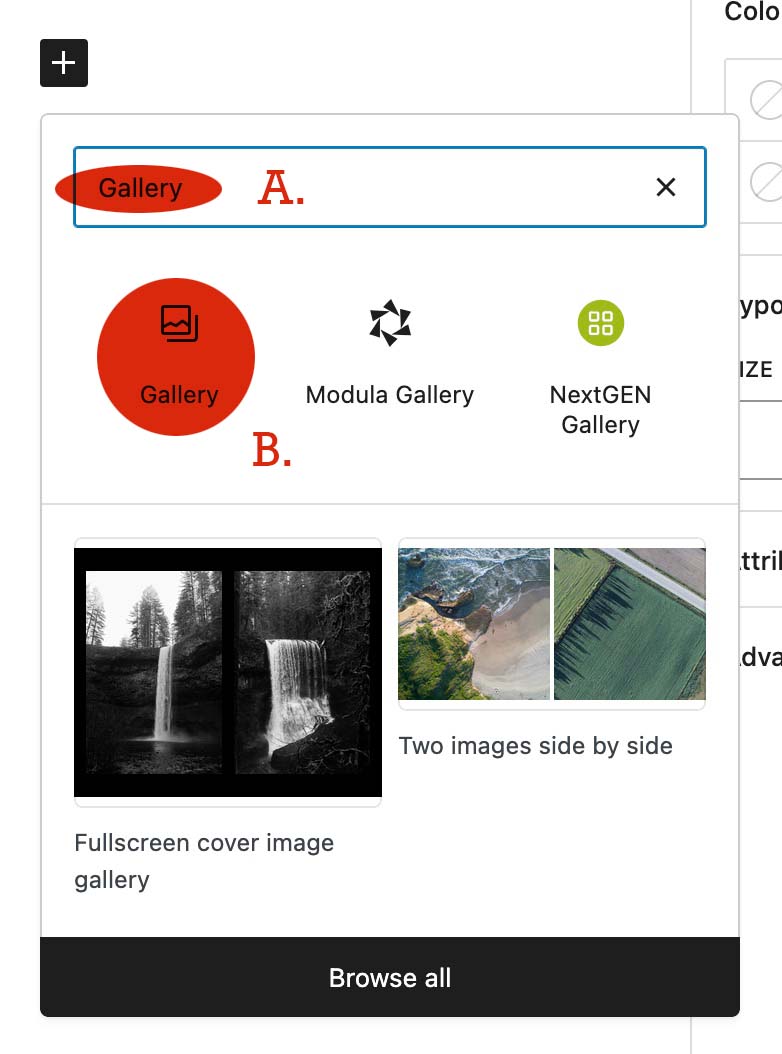
3. Then, (A) type in the search “Gallery”. Finally, (B) click on the Gallery icon below the search bar and you will see your gallery module appear.
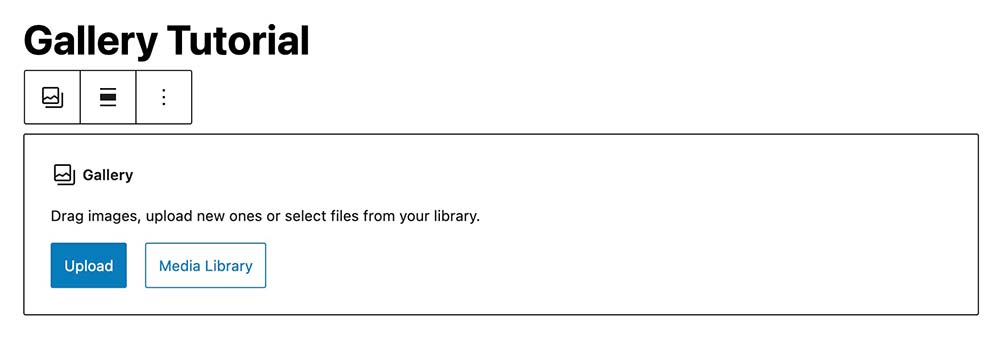
4. Assuming you have sized and compressed your chosen images, and saved them in a folder on your computer, click the “Media Library” button.
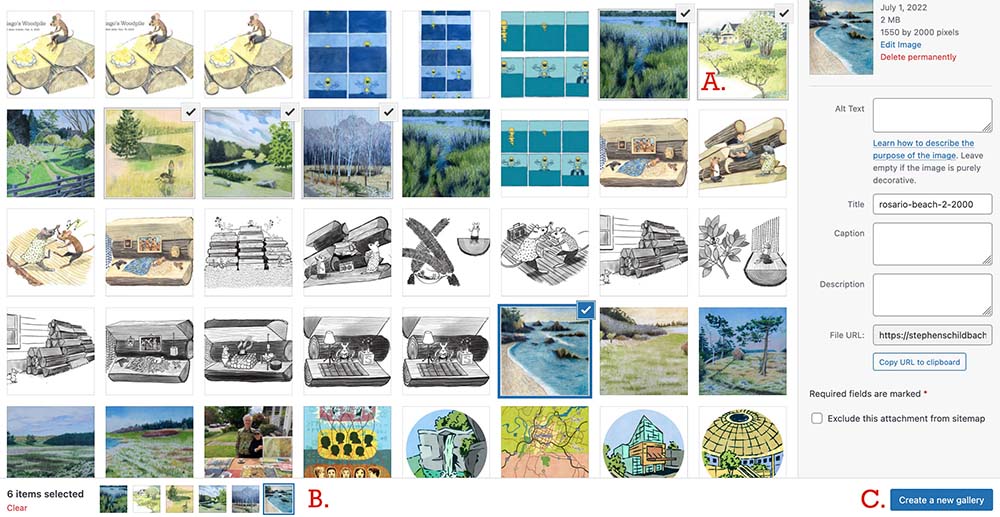
5. (A) Click on all the images you want to be in this gallery. They will show a check mark next to them. You can add more later too. (B) Note that the images also show up at the bottom left of the media section. (C) Click on the “Create A New Gallery” button.
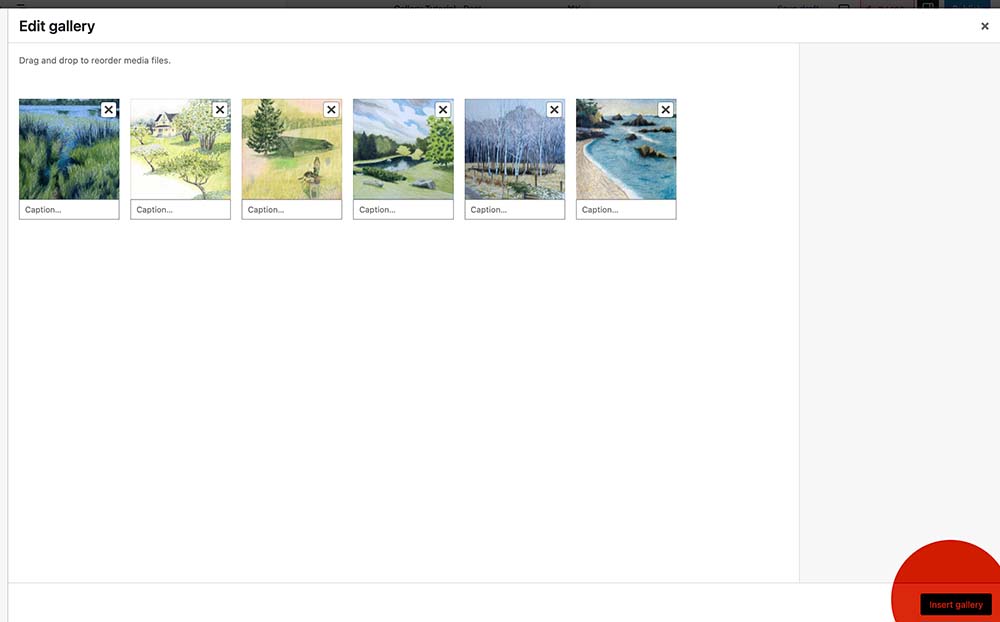
6. You will see your image thumbnails of which you can grab and sort if you like. Then, click the blue “Insert Gallery” button in the lower right.
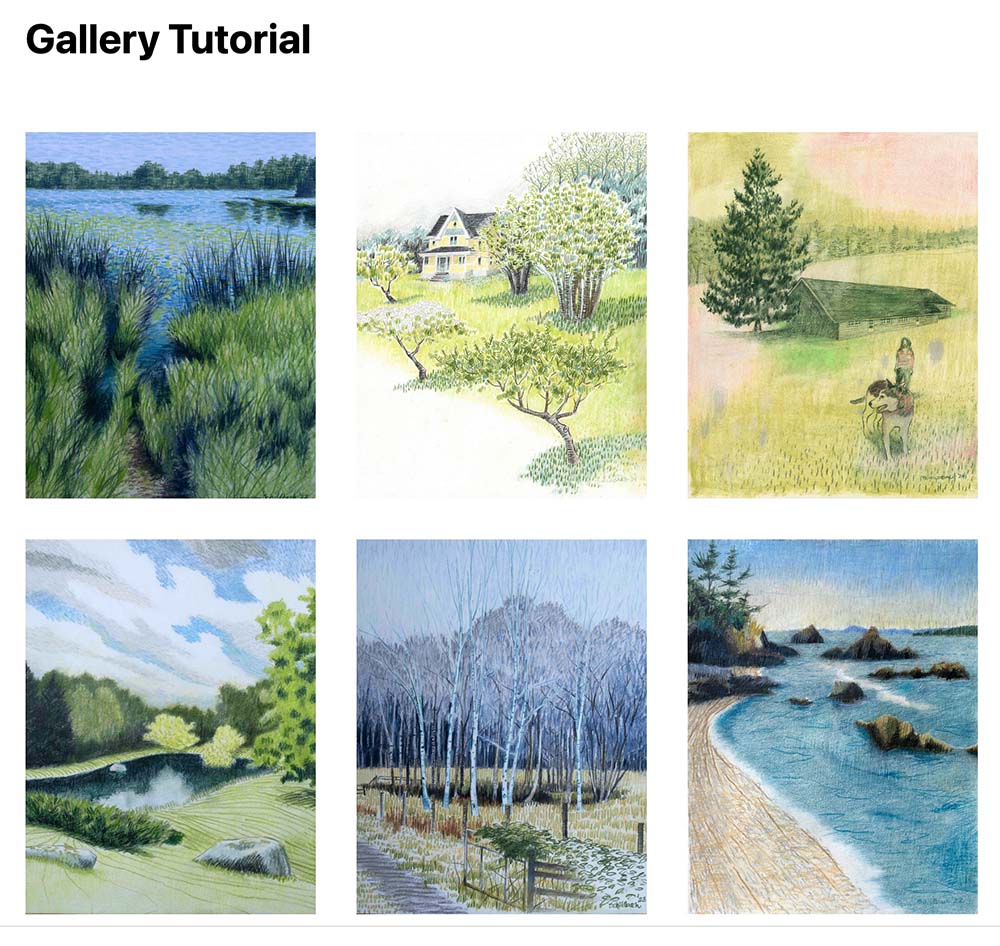
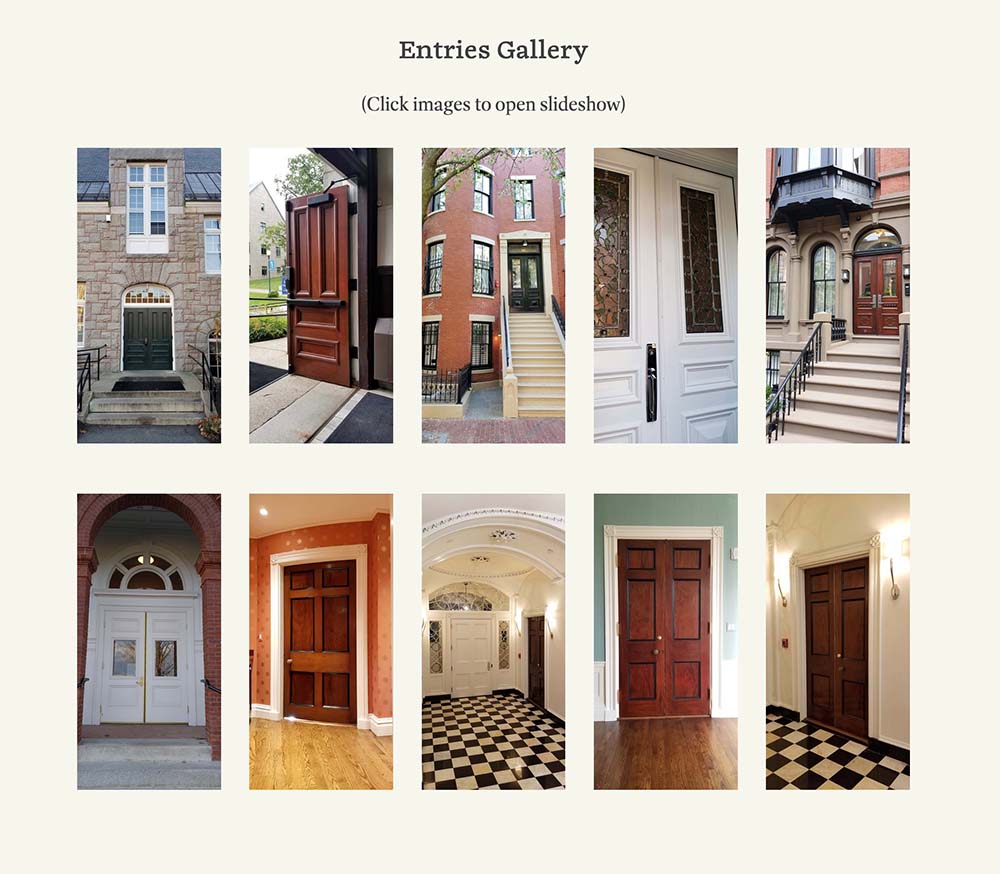
7. By default a WordPress Photo Gallery displays the photos in 3 columns.
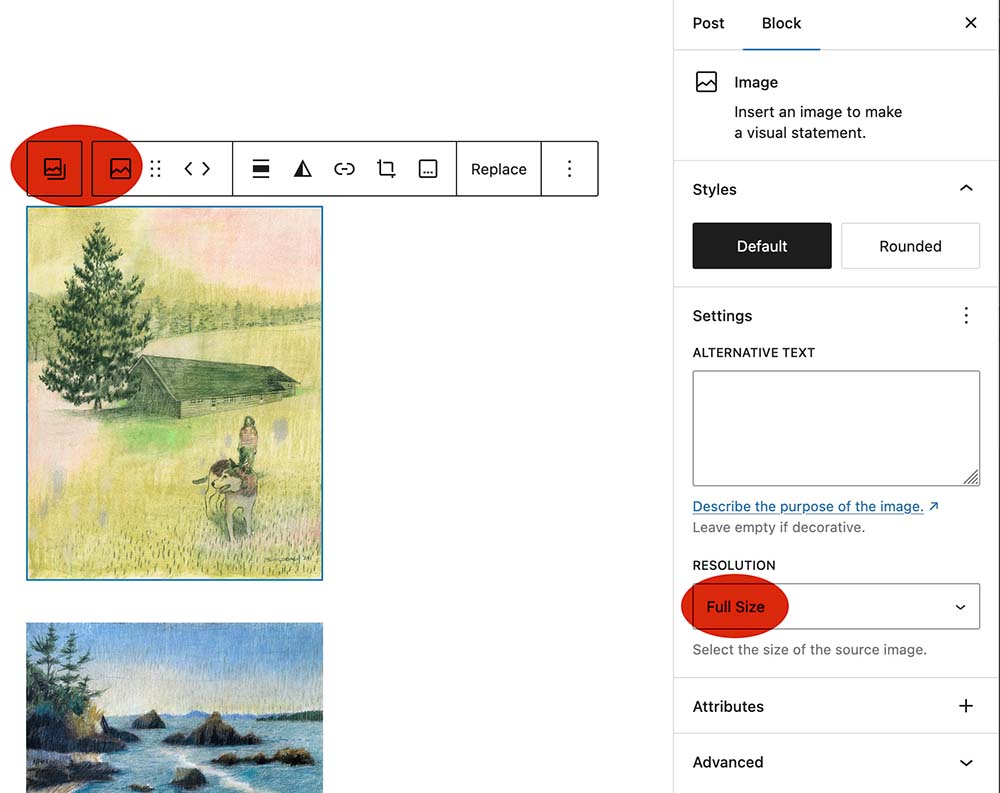
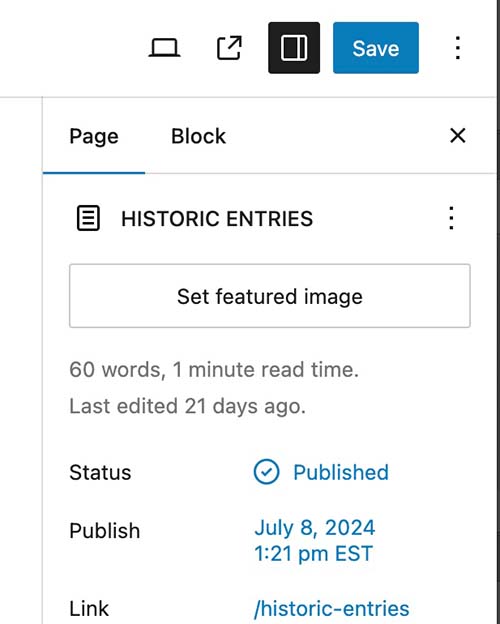
8. There are two details to check or change. First, because your images will open up in a lightbox, you want to make the images open to your full size settings of 1920px. So, click on each image and set that images resolution to “full size”.
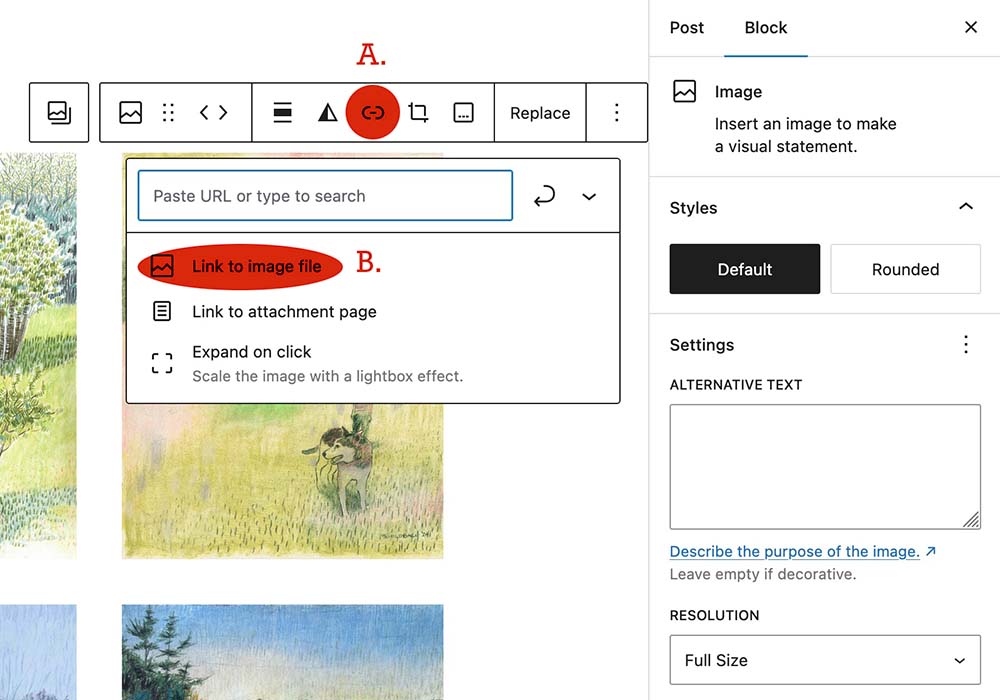
9. Second and last detail for lightbox to work: the images will only open in the lightbox if their (A) link is set to (B) “Link to Image file”. So, on every image, click the link icon and set the link to “Link to Image file”.
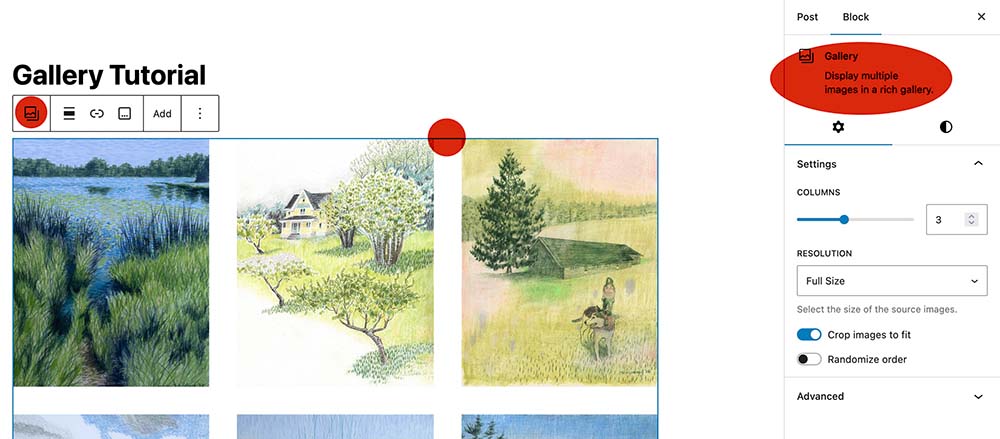
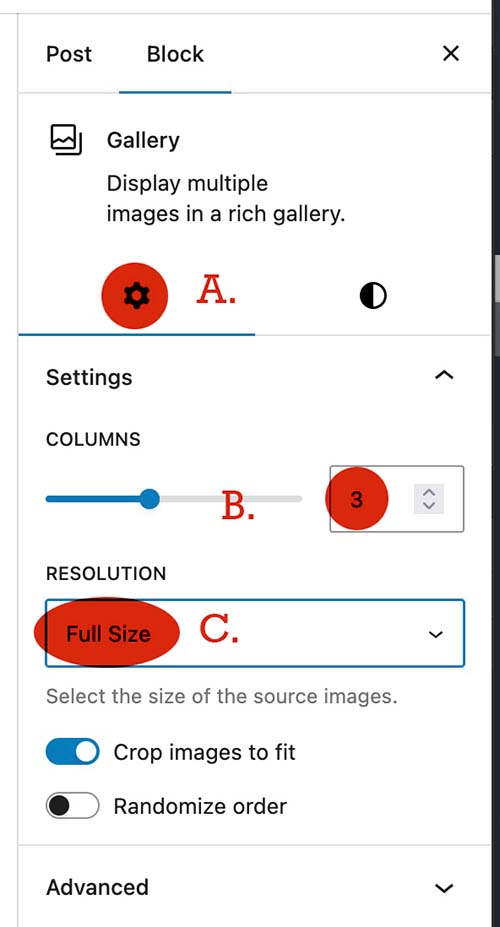
10. If you want to change the layout, you need to click on any of the the images and then the Gallery icon which will take you to the Gallery view and settings.
11. The right column will display Gallery block design options like columns. Make sure the tab is set to “Block”, set the columns to the quantity of your choice by using the slider, the arrows, or typing in the number. The rest can be left as is.
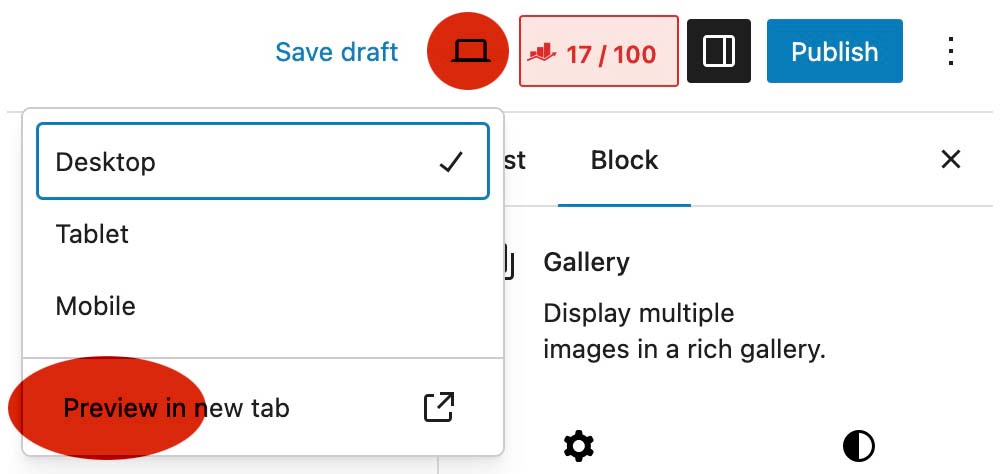
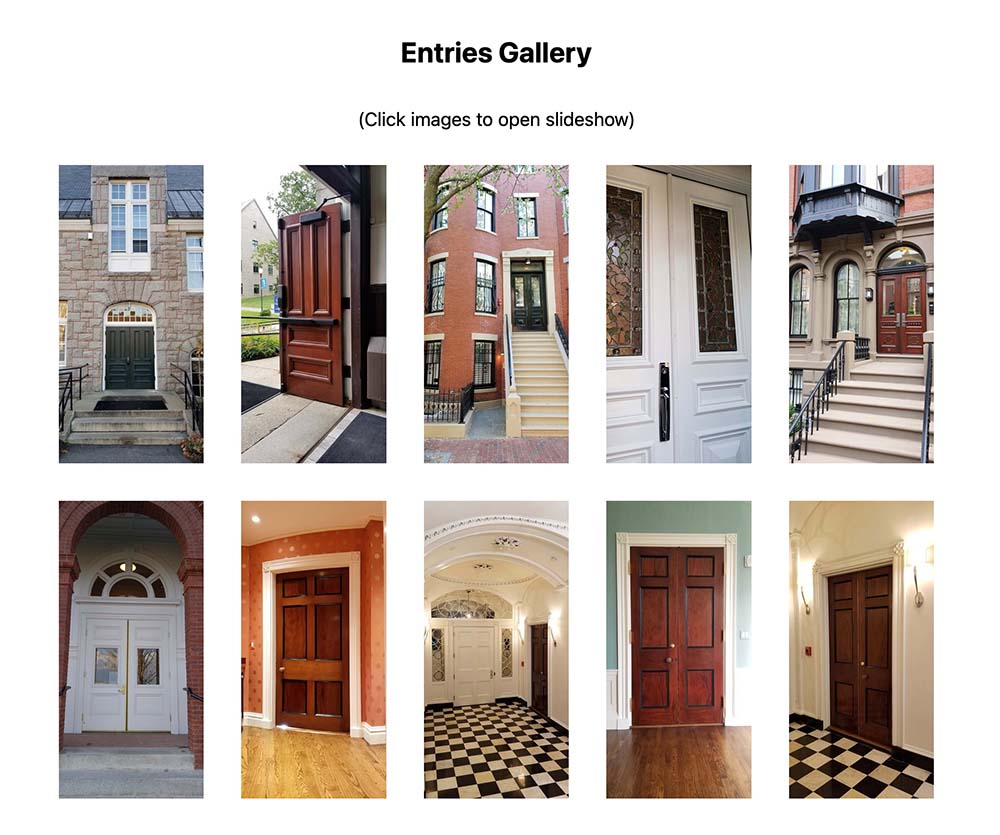
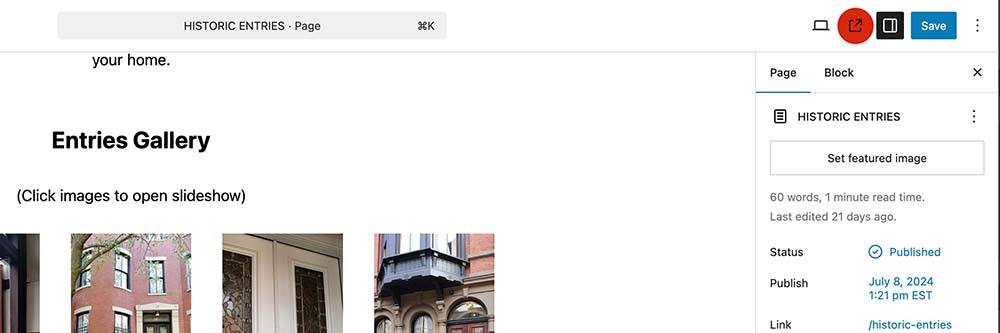
12. Check your work by clicking on the laptop icon in the upper right hand corner first, then clicking on the flyout “Preview in new tab”. If the new tab reveals the look you intended, come back to this tab in your browser and choose either “Save draft” or “Publish”. You are done making your photo gallery. Now, let’s edit it.
Editing and Maintaining Your WordPress Photo Gallery
1. Although, not necessary, it is a best practice to work on your images and upload them in to the media gallery first. Assuming you have completed your images in Photoshop, and logged in to your site, let’s start by going to the media gallery. In the black bar at the top, hover over “+ New” and click on “Media” in the flyout.

2. In the media gallery, click on the “select files” button. Your computer files will pop up.
3. Find your images, open either one image or all of the images that you want uploaded. Be sure they are the images that you sized and compressed to be 300kb or under. Opening these images will upload them in the media gallery. You can proceed with putting them in your WordPress Photo Gallery.
Adding, Deleting, Moving, and/or Replacing Images
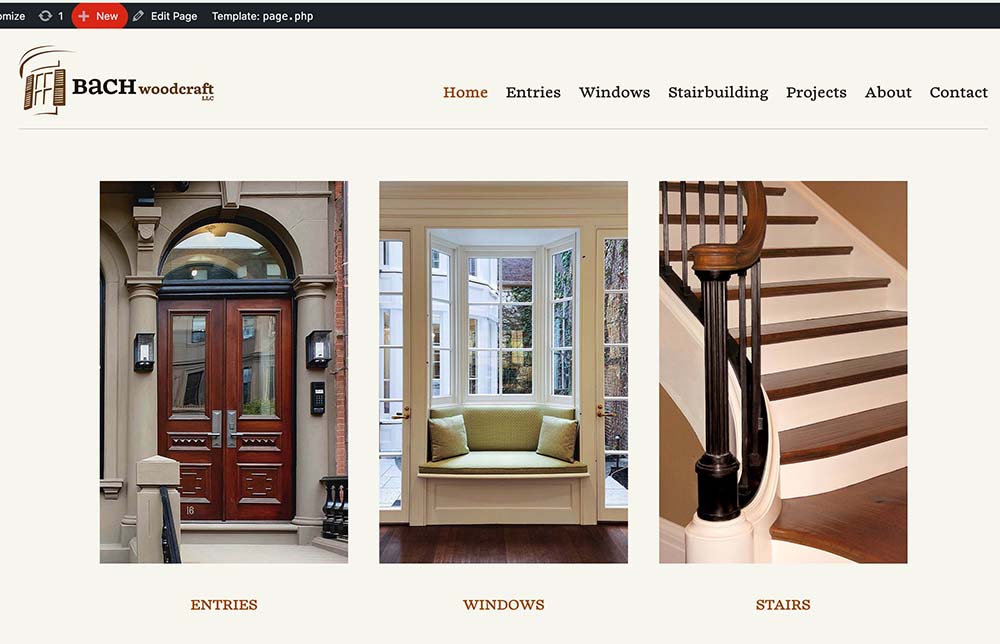
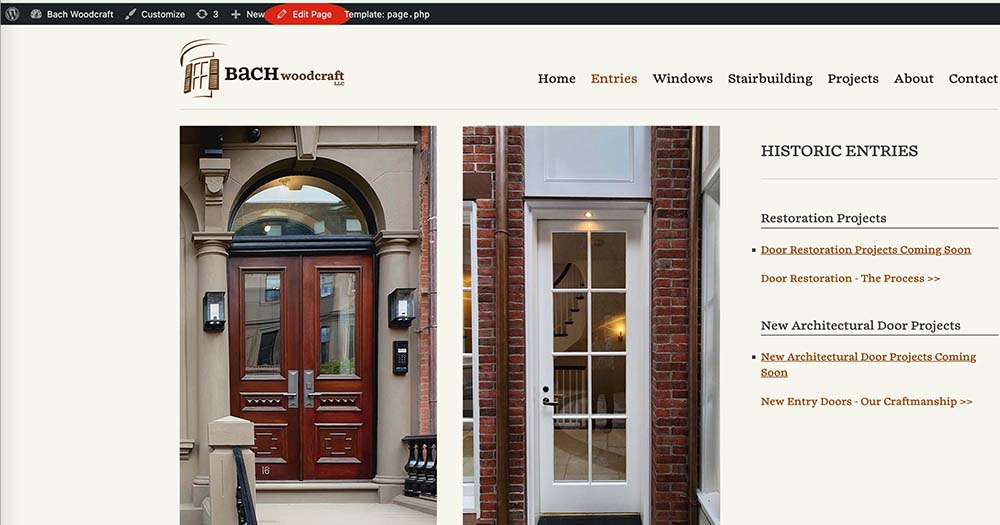
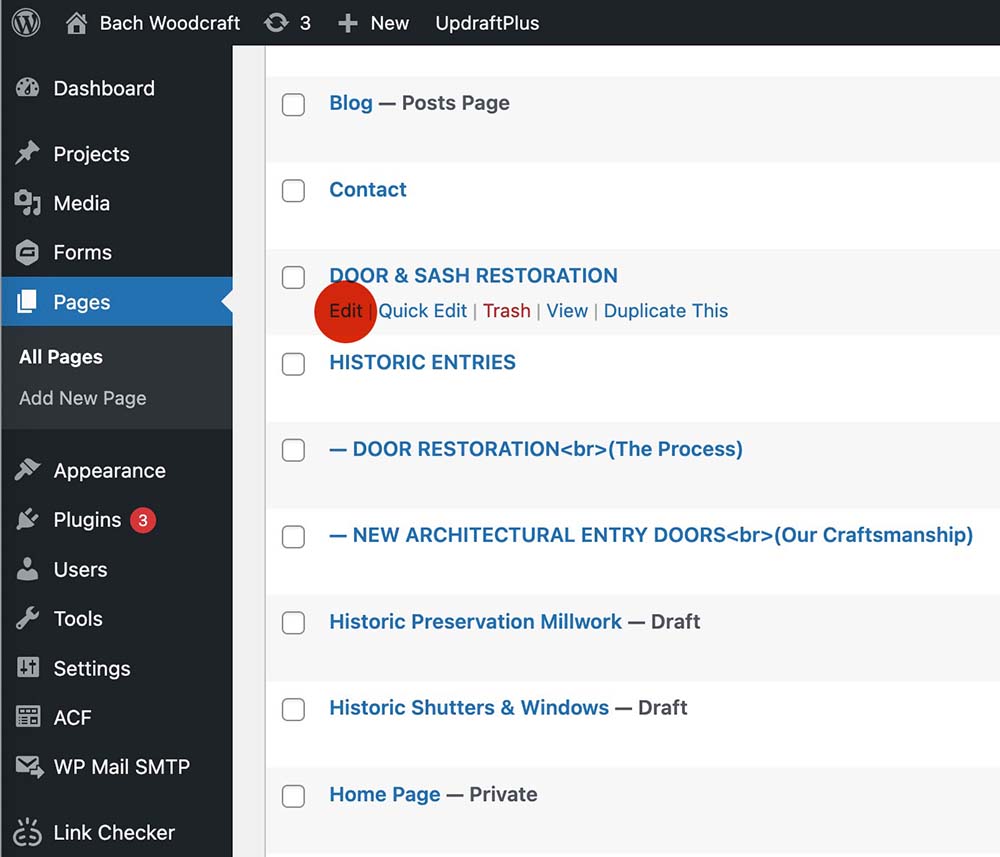
1. We will use my client Bach Woodcraft to demonstrate how to edit a WordPress Photo Gallery.
2.. Click on Edit to get to the dashboard
3. When in the dashboard, and on your page containing a Photo Gallery, scroll down to get to your existing gallery module.
4. This is where it can get tricky, so follow this concept of how the Gutenberg editor works: Like nesting dolls, there are objects inside of frames (two nesting dolls in this case) You have the Gallery frame and inside of this gallery are individual images like eggs in a carton. When editing, you need to be aware of whether you are changing the gallery or the individual images.
This awareness applies to all editing. For example, if there are columns, you have to be aware of whether you are editing the column, the column cell, or the object in the column (three nesting dolls). These principles become more important to know that you are adding new columns, cells, images and text, which you will not be doing here. Here you are modifying existing content. In tech, they like to call this the parent object (gallery) and the child object (image).
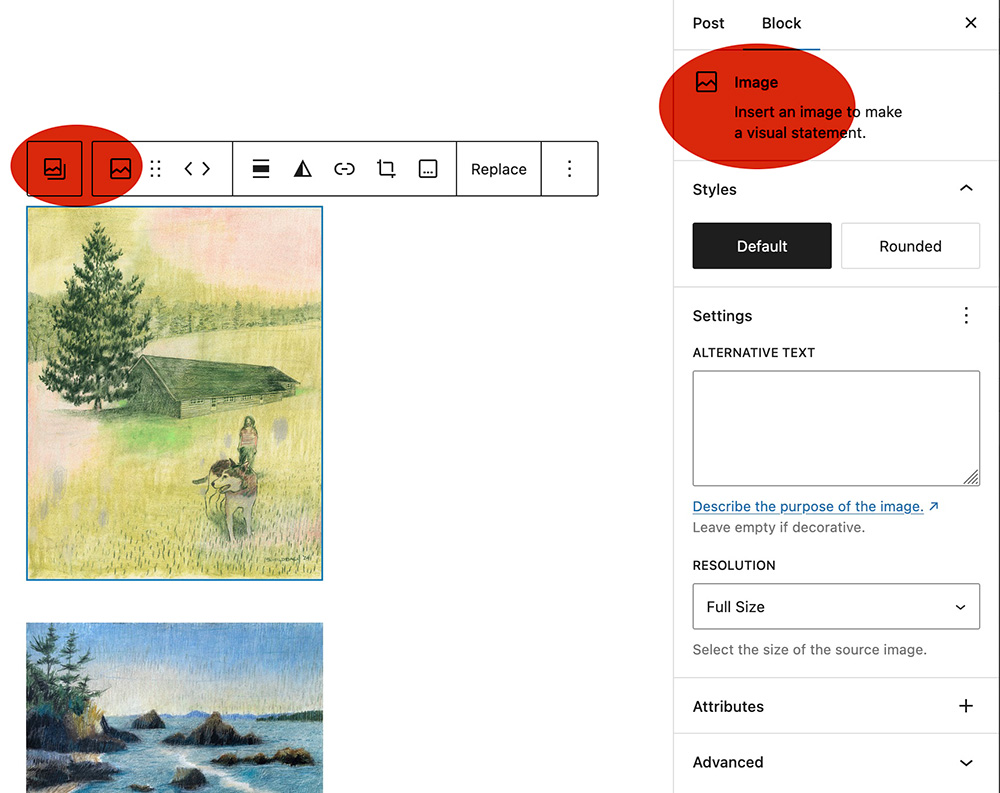
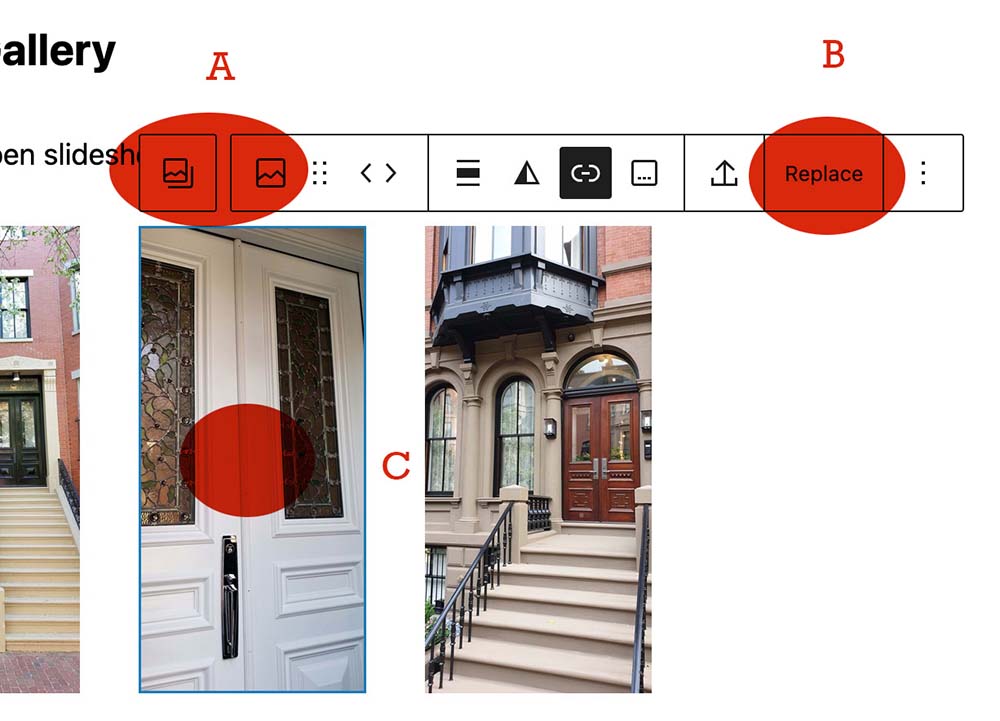
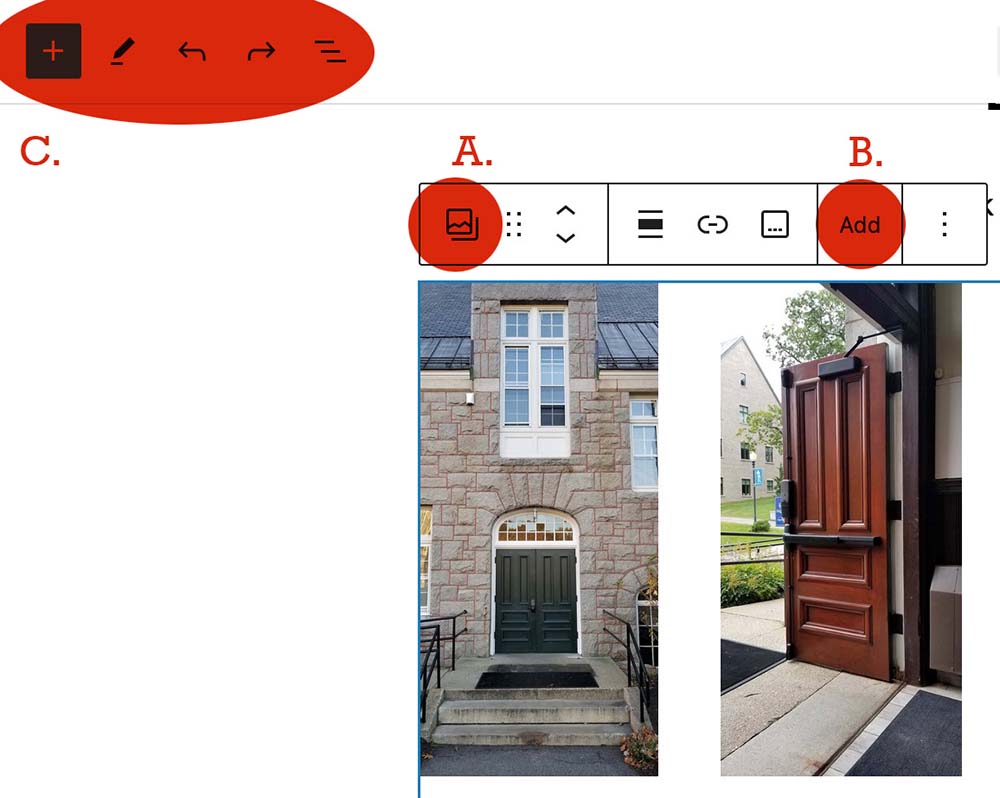
5. Replacing an image: Click directly on the object you want to replace. You will see this navigation bar pop up. (A) Note that the image icons are there to tell you where you are. While working on the individual image, to replace the image click (B) replace.
Clicking on the far left icon (image icon with a backwards L under it, will take you “outside” to the gallery frame (think nesting dolls again, or going from the egg to the carton). You will notice that when you are working on the gallery frame (all images), only the gallery frame icon shows and the image icon disappears. Essentially, if you see two icons you know you are working on the individual image, one icon with the backwards L and you are working on the gallery and all images.
Tech tip: If you hover over any icon for a second, it will reveal a tool tip in black telling you what that icon does. Hover over the Gallery icon and it will say “Select Parent Block: Gallery”.
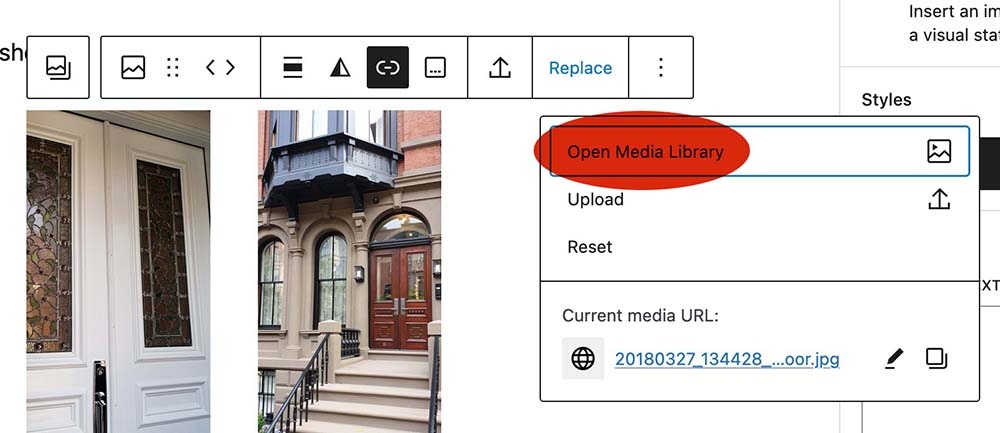
6. Assuming you have uploaded your new images, Click on the “Open Media Library” button.
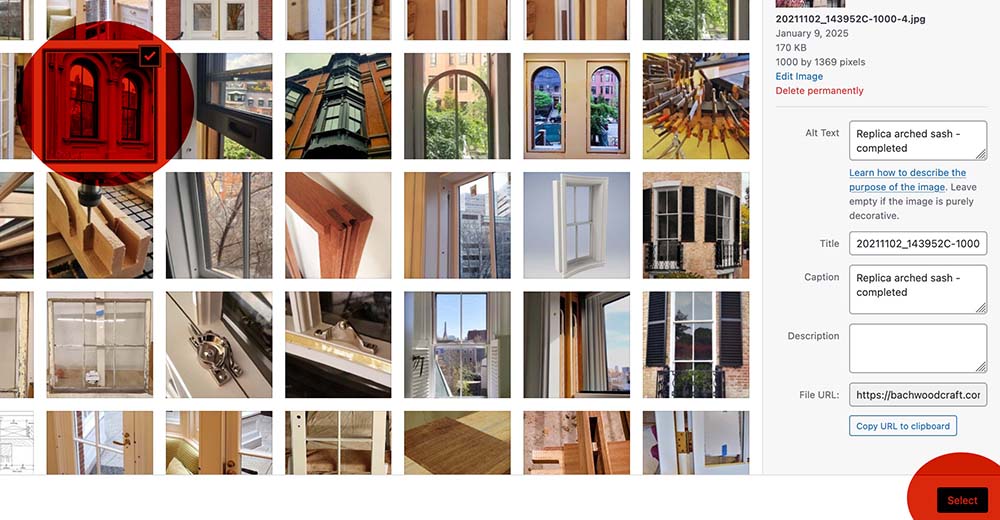
7. Click on the thumbnail of your chosen image, note the blue check mark, then click select. This view will disappear and take you back to the Gutenberg editor.
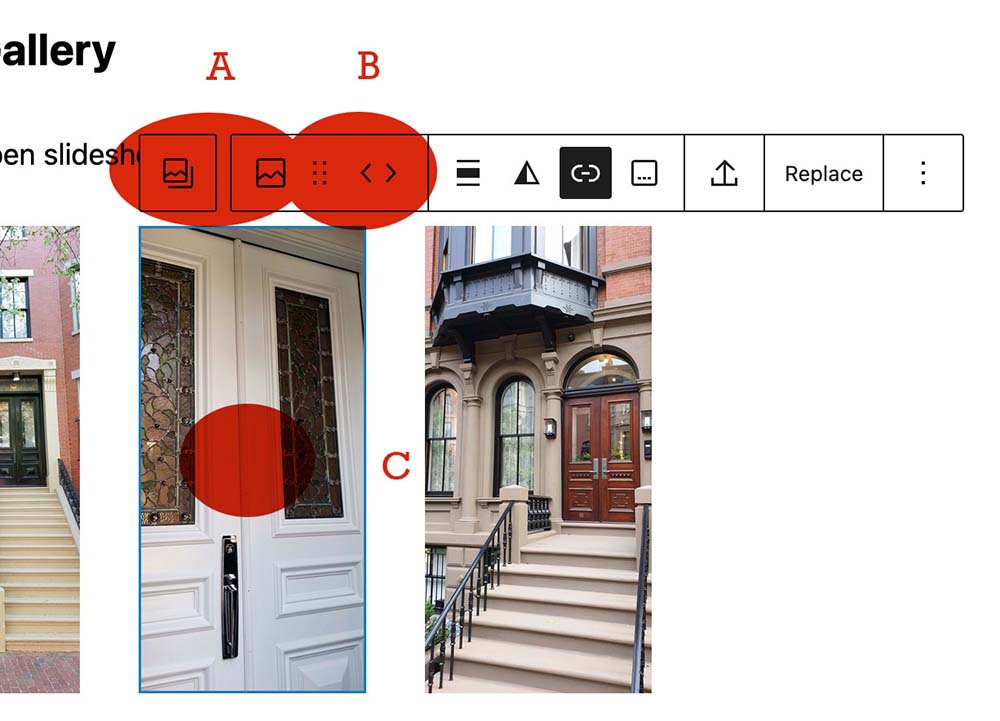
8. Moving an image: When moving an image, while in image mode (A), click on an image (C), then either click on the arrows (B) to move the image left or right, OR grab the 6 dotted icon (B), to drag the images to another location. To play it safe, I’d do the arrows.
9. To delete an image: simply click on it until it has the blue border around it, and press delete on the keyboard.
10. To add a new image: click on any image first, then click on the (A) gallery icon to the far left (Select Parent Block: Gallery). You will notice that the navigation bar changes, removing the image icon (second from the left), and adding the word “Add”. Click (B) “Add”. and it will take you to the media gallery. You will notice (C) a few icons in the upper left of your browser. Some people might like using these, I never use them.
11. Clicking “Add” takes you to the same option as #6 above, where if you have your new images uploaded in the gallery, choose “Open Media Library” in the popup.
12. As you have done in #7, choose the thumbnail representing your chosen image and click the select button in the lower right.
13. Whether you have deleted, moved, added, and/or replaced images, the final step is to save your work by clicking on the blue save button in the upper right of your browser. If you forget to save your work, WordPress will tell you when leaving the page.
14. To view your work, click on the “view page” icon.
15. To leave your work and this dashboard page, click on the black box in the upper left hand corner which may or may not have a WordPress or logo icon in it (that depends on whether your icon is black, or another color, or if there is a logo there at all)

16. When clicking on the black box, if you hover over it first, you will notice the tool tip says “view pages”, that is because it is taking you to the list of all pages on your site. From here, you can go to other pages and don’t need the direct link. When you hover over a page it will give you a number of options, the one you will most commonly be clicking on is “Edit”. Edit will take you to the back end of that page in the dashboard with the Gutenberg editor (where you were in this lesson).
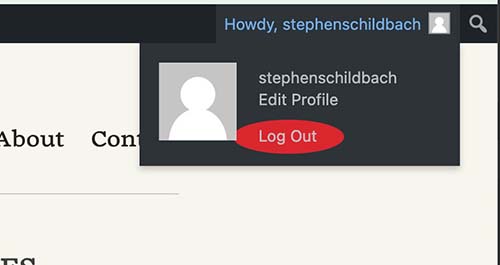
17. Hover over your name in the upper right hand corner of your browser and log out of WordPress.
Thank you for sticking with my step by step guide to a WordPress Photo Gallery. If I get a good response from this one, more will follow.